|
|||||||||||||||||||||||||||||||||||||||||||||||||||||||||||||||||||||||||||||||||||||||||||||||||||||||||||||||||||||||
|
Construire un K2
2001, je prends la décision de construire un K2. Je ne suis pas un professionnel de l'électronique! Mais Gérard F6EHJ est là, un vrai pro, avec sa compétence et sa pratique de langue anglaise.
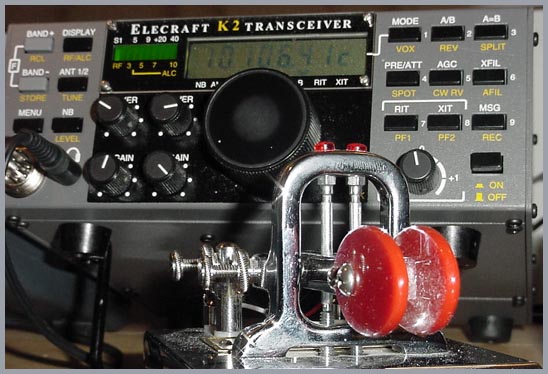
Elecraft met à la disposition des radioamateurs un kit permettant de construire un transceiver décamétrique dont les qualités sont à la hauteur des meilleurs produits disponibles sur le marché tels que le Yaesu FT1000MP ou le Ten Tec OMNI VI. Prévu à l'origine exclusivement pour le trafic en QRP (5 watts output) Elecraft propose maintenant un module amplificateur permettant d'avoir une puissance HF de 100 watts. Le premier K2 construit K2 numéro de série #1802
cliché F6BLK I-Avant de se lancer Outillage :
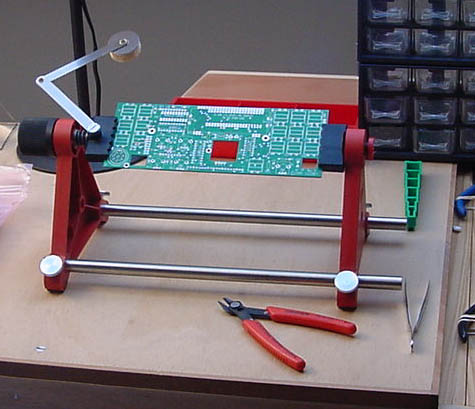
Plan de travail :
Table ou établi, bien éclairé, équipé d'un petit étau amovible, de casiers pour ranger les composants, d'un support de fer, d'un nettoyeur de panne (ou d'une éponge humide) cliché F6BLK cliché F6BLK
II-Commander son K2 La commande peut s'effectuer via internet ou par courrier. Sur le site Elecraft le bon de commande fait les calculs automatiquement (en $ bien sûr). Choisir le mode d'expédition. Le rÚglement peut s'effectuer directement via Internet par PAYPAL. Nous utilisons systématiquement ce mode de paiement qui offre une excellente sécurité et qui limite les frais de change. Ne pas oublier les frais de dédouanement qui se rÚgle au moment de la livraison directement au livreur. (La Poste ou société privée Chronopost, Extand�?�) Estimation des frais de dédouanement pour la France : Contrairement à une idée reçue, les droits de douane proprement dits sont faibles (environ douze euros pour un K2) par contre la TVA est de loin la partie la plus importante : 19,6 % sur la valeur de la marchandise + 2/3 des frais de port. Ceci étant, le prix de revient total d'un kit K2 reste trÚs raisonnable... Faut-il encore le construire, c'est ce que nous allons voir ensemble maintenant. III-Garantie Mais oui, le transceiver que vous allez construire est garanti un an. Lisez bien les conditions (encadré grisé, page 4 du manuel de montage), mais il faut vraiment le faire exprÚs pour tomber dans les clauses d'exclusion ! IV-Réception du kit Passé le moment d'excitation, bien compréhensible, où vous découvrez fébrilement le contenu du colis qui vient de vous être livré, il faut vérifier s'il ne manque rien, en particulier au niveau des composants. C'est un inventaire un peu long, fastidieux, mais indispensable, qui permet de repérer et d'identifier les différents types de condensateurs, de tores, etc...
Les composants sont contenus dans des sachets en plastique facilement repérables grâce à leur étiquetage : - Control , - Front Panel, - RF Board, - Miscellaneous, - Wire. Dans le manuel de montage vous trouverez un inventaire complet des composants sous la forme de tableaux illustrés de photo, intitulés Appendix A suivi de l'intitulé de chaque poche, exemple : " K2 Control Board Parts List ". PremiÚre étape : familiarisez vous avec le marquage des composants exemple : condensateur de 0.001 = 102 ; 0.01 = 103 ; 0.1 = 104 ; 0.047 = 473 etc. DeuxiÚme étape : munissez vous de petites boîtes de rangement (ou de casiers) et répartissez les composants d'une seule poche dans vos boîtes en les classant par type et par valeur : une boîte pour les condensateurs 102, une pour les 103, une pour les 104 et ainsi de suite. A chaque fois que vous mettez un composant dans une boîte cochez le sur le tableau correspondant (Appendix A). N'oubliez pas de munir vos boîte d'étiquettes. Ne mélangez surtout pas les poches. Les résistances sont livrées attachées et classées dans l'ordre exact de montage. Il est inutile d'en faire l'inventaire. Elles seront détachées une à une lors de leur installation sur les circuits imprimés. Tout est en ordre ? Il ne manque rien ? Passez à l'étape suivante. Il manque quelque chose ? un élément est défectueux ? envoyez immédiatement un e-mail à Elecraft en expliquant de façon précise le problÚme, cliquez sur e-mail Dans la semaine qui suit vous recevrez, gratuitement, le composant manquant. V-La construction Nous n'allons pas reprendre tout le manuel de montage. Je le trouve personnellement, plus précis, plus complet et plus pédagogique que les manuels, pourtant fort bien faits, d'Heathkit. AprÚs quelques conseils d'ordre général, nous nous arrêterons simplement sur les difficultés que nous avons rencontrées et les erreurs que nous avons commises.
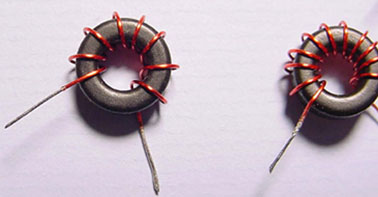
Utilisation des tores, fabrication des selfs et autres transformateurs
C'est l'opération qui rebute le plus le débutant, à tel point que la maison Elecraft, consciente du problÚme, offre la possibilité de faire bobiner les selfs par Mychael Morohovich - AA3WF e-mail. En fait il s'agit d'une opération simple à condition d'être un peu soigneux et attentif. Séparez d'abord les tores en contrÎlant le diamÚtre avec un pied à coulisse et en vérifiant la couleur ; méfiez vous, il est trÚs facile de se tromper ! Vous devez trouver trois types de tores :
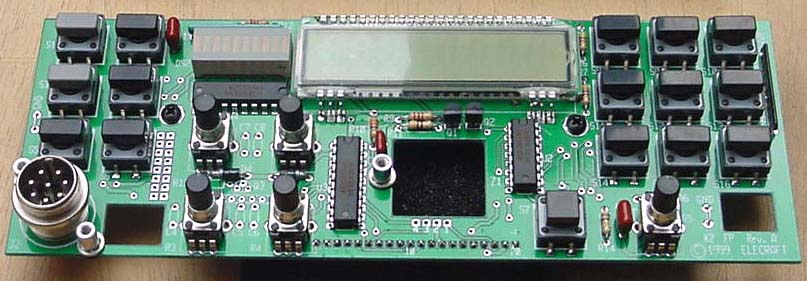
Le bobinage des tores est une opération simple à condition de : - respecter le sens du bobinage en contrÎlant sur le manuel (chaque bobinage fait l'objet d'un ou plusieurs dessins), - respecter le nombre de spires indiqué dans le texte, en comptant une spire à chaque fois que le fil passe à l'intérieur du tore. Attention, sur les dessins le nombre de spires est souvent faux ! exemple : RFC14 comporte dix spires, la figure 6-15 en montre 14!, - maintenir le fil en tension (légÚre) pendant le bobinage, - répartir le bobinage de façon réguliÚre sur environ 85 % (80 à 90%, ce n'est pas critique) du tore, sauf indication contraire, - vérifier l'absence de chevauchement des spires. Lorsque le bobinage est terminé, vérifiez le nombre de spires, le sens de l'enroulement, laissez 15 mm de fil libre à chaque extrémité et coupez l'excédent. Ne jamais gratter le fil avec un canif ou un cutter pour faire disparaître l'émail, vous risquez de fragiliser le fil. AprÚs avoir essayé plusieurs techniques, j'utilise celle de la goutte de soudure. Former au bout de la panne du fer une grosse goutte de soudure au travers de laquelle vous faites passer l'extrémité du fil jusqu'au moment où l'émail se boursoufle et disparaît. Votre fil est étamé ! Un conseil, tenez le tore avec une petite pince, sans serrer, pour ne pas vous brûler. La platine "Front board" La seule vraie difficulté est la mise en place des cinq potentiomÚtres. Chaque potentiomÚtre est munie de quatre picots qui entre en force dans les trous prévus à cette effet sur le circuit imprimé. Il faut exercer une pression assez forte, attention de ne pas appuyer sur l'axe du potentiomÚtre.
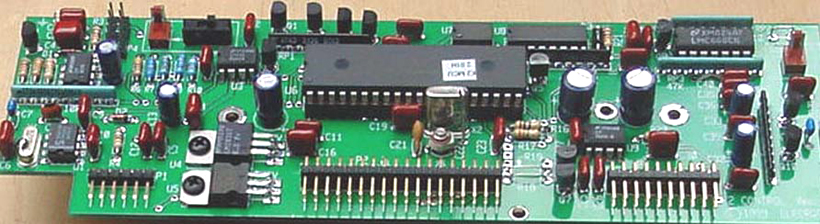
La platine "Control board" Pas de difficulté particuliÚre.
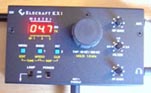
Construire le KX1, le petit nouveau transceiver QRP Elecraft Cliquer sur la photo pour aller voir l'ultra-portable transceiver KX1 cliché F6BLK pour revenir à la page d'accueil
|

;)
;)

;)